Bathrooms can be a little intimidating, however if you are just replacing the vanity and tile, it’s definitely doable!
BEFORE

Choose your design before you begin.
I struggle on the design bus so if you’re like me, search through the internet and find your favorite design. Pinterest is my favorite. I can pick out items in a picture that I like and piece it together.
Color scheme – what is the look you are going for? Are you into light colors or bold and dark. Do you want the bathroom to be completely different than the rest of your home or do you want it to match?
Vanity style – this will also play into your color scheme. This will also depend on your budget. Do you want it to be custom built or are you trying to get the best deal?
Fixtures – Will you be replacing the lights, faucets, cabinet doorknobs and any towel holders? Do you want it to all match or do you like the mismatch look?
Shop around!
Visit all the stores that you can think of that would help you create your ultimate bathroom. When we did our bathroom, we were surprised to find some good deals by going to the more unknown, discounted stores. However, if you buy in piecemeal, there may be extra costs that you don’t think about along the way. Also, depending on the size, some stores have returned items that are discounted and basically brand new!
Usually when a new floor is installed, new baseboards will be added. What we ended up doing was the tile became the baseboards. This actually was easier than baseboards for us and we really liked the way it turned out.
Make a budget. Sometimes it’s easy to forget about the little items like a towel rack but if you want to replace it, it all adds up.
Demo Day!
Demo Day! Things to remember – if you have bulk pickup in your neighborhood, I suggest doing demo around that time. All the trash has to go somewhere, and you’ll have to pay for it if it’s not an option to put on your curb for them to pick it up.
Never expect it to go as planned. If you’re anything like my husband and I, we’ve never remodeled a bathroom, so who knew how it was going to go! Yes, projects here and there and we know the basics, but you never know what you’re getting into until your knee deep! That is part of the fun of it though, right?! Hopefully, waterlines or possible leaks are out of the question, but the labor of how much work you are able to take, is a case-by-case basis.
I remember going into Day 2 thinking I hiked a marathon with how sore I was! It’s embarrassing to admit, but my knees and legs were on fire! Which made Day 2 a little slower as well. lol
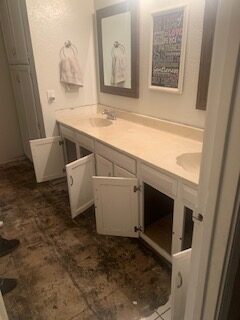
Before beginning.
Make sure to shut off the water before you start to tear everything out. Disconnect the plumbing lines from the wall and the faucet lines from the wall. Shut off the electricity when taking down the lighting fixtures to ensure no accidents.
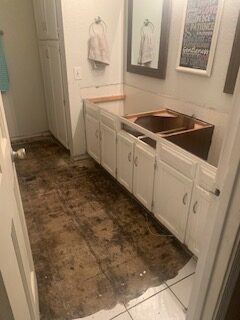
I am NOT a professional and definitely NOT a perfectionist so please take my advice for what it is. IF you’re not impatient like myself and just want to get in there ASAP, I would recommend painting first. I didn’t have the paint color figured out yet, so we did the floors first. Which was fine too but thinking back, it probably would have been smart to paint and not have to worry about spilling the paint anywhere.
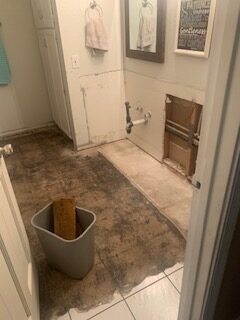
Installing the floor.
After the surface is vacuumed, cleaned and ready for the new floor, you can begin your installation. I highly recommend knee pads! Even if it’s a small bathroom, those knees will be VERY sore the next day no matter what. Or maybe if you’re super young, this won’t affect those good knees haha.
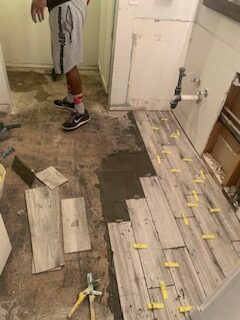
Installing the vanity – make sure you measured your space more than once to make sure your vanity will fit. Our house was old, and the vanity size was unusual, so we had to piece three different pieces together. We didn’t want to leave any space on either side, and this was the cheapest way rather than ordering specific sizes from Home Depot.
This was a little trickery than we anticipated. Even though we had the right size, to line it up and insert it with the pipes out of the wall was a little more complicated. We had to of course create holes in the back of the vanity but with where the drawers of the vanity and where we wanted the holes to go was a different story.
Once we finally got the vanity in, we celebrated and took the day off! haha.
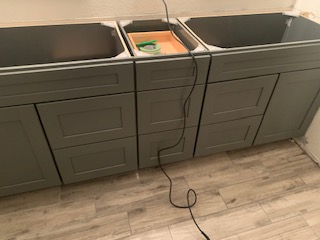
Installing the countertops – this was something we called someone to do for us. They were able to come to the house to do measurements and install it with the sinks as well.
Installation of faucets were easy. I recommend YouTube if you have questions.

Painting the bathrooms and finishing the baseboards and any caulking.
What do you think of these tips?
Leave a comment and let me know what you think of these suggestions and what works for you.
